
It's payback time and I thought this would be helpful to some of you. Yes, you can copy the design and build yourself one despite the drawing border info. You may not manufacture and sell them however without permission.
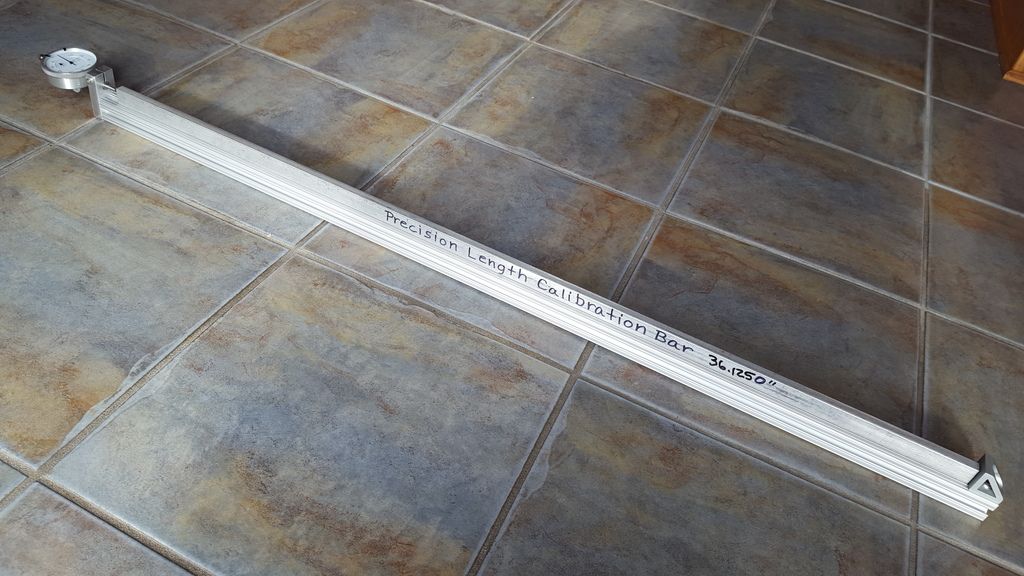
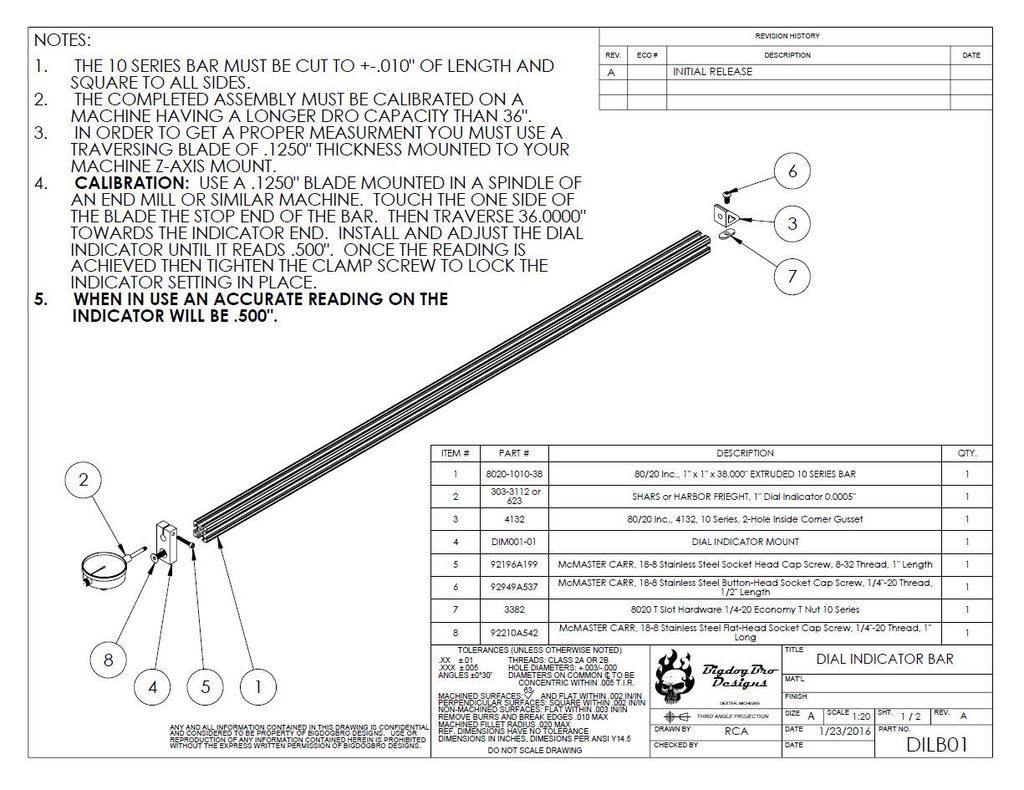
Have you ever wondered if your plasma cutting table travel distance was really accurate and if both the X & Y axis were the same travel. You say the DRO said it moved 16.000 inches but did it REALLY? Or those precision brackets the customer wanted were truly to print. So did I...So I designed and made a dial indicator bar that is for measuring and setting up my plasma cutting table. Whether your machine has steppers or servo type motors and rack-and-pinion drive it makes no difference if they are not tuned and setup properly for step distance.
My particular table uses belt drive for the X and Y axis and from time to time it needs to be checked or have the belt tightness adjusted. This tool may be overkill to some but I wanted a project to play with over the winter time and an easy, accurate method to set or verify my DRO travel distance to the actual machine movement. I have a 4ft x 4ft cutting table so the longest even FOOT length for me was 36".
The longer the distance you can measure the better it is to achieve higher accuracy. So if you measure 1.00" using a dial indicator and you are .002" short then in 36.00" you would be .072" off. That's wider than the cut kerf on my plasma torch.
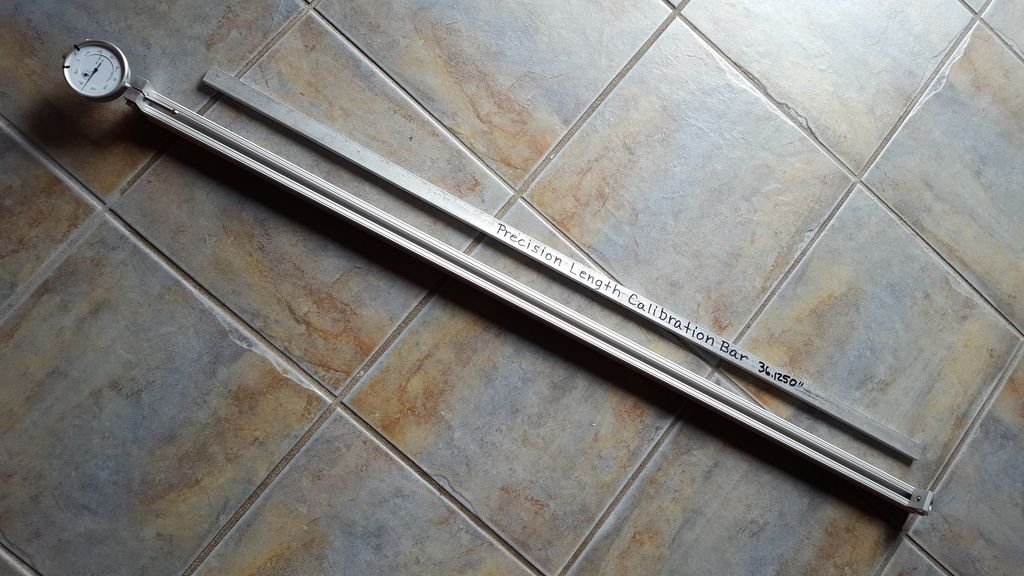
The bar indicator is calibrated to read .500" at 36.000" movement using the .1250" thick travel blade.
The extra .1250" length is for the blade thickness. So when you travel 36.000" on your axis you will read .500" on the one inch travel indicator.
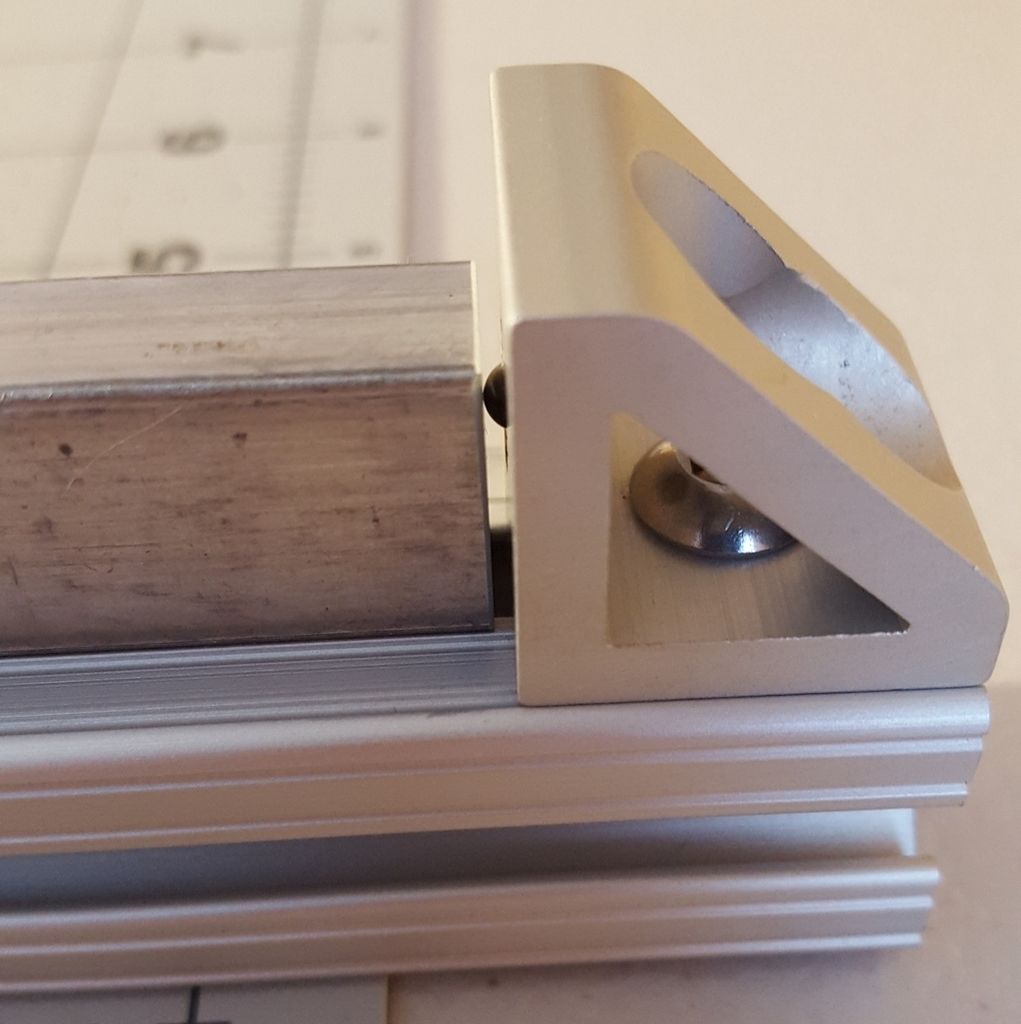
I modified my original idea and installed a small bearing ball in the stop end for a more accurate reading point on the blade. The method of installing a bearing ball and its size is up to you. Just don't have it stand out from the stop any more than 1/16th inch.
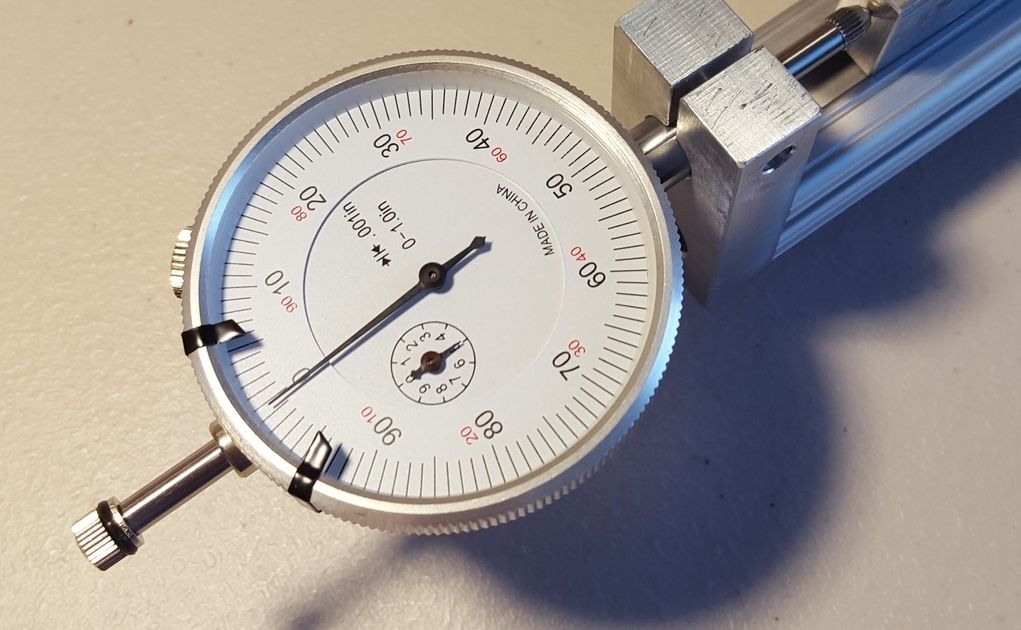
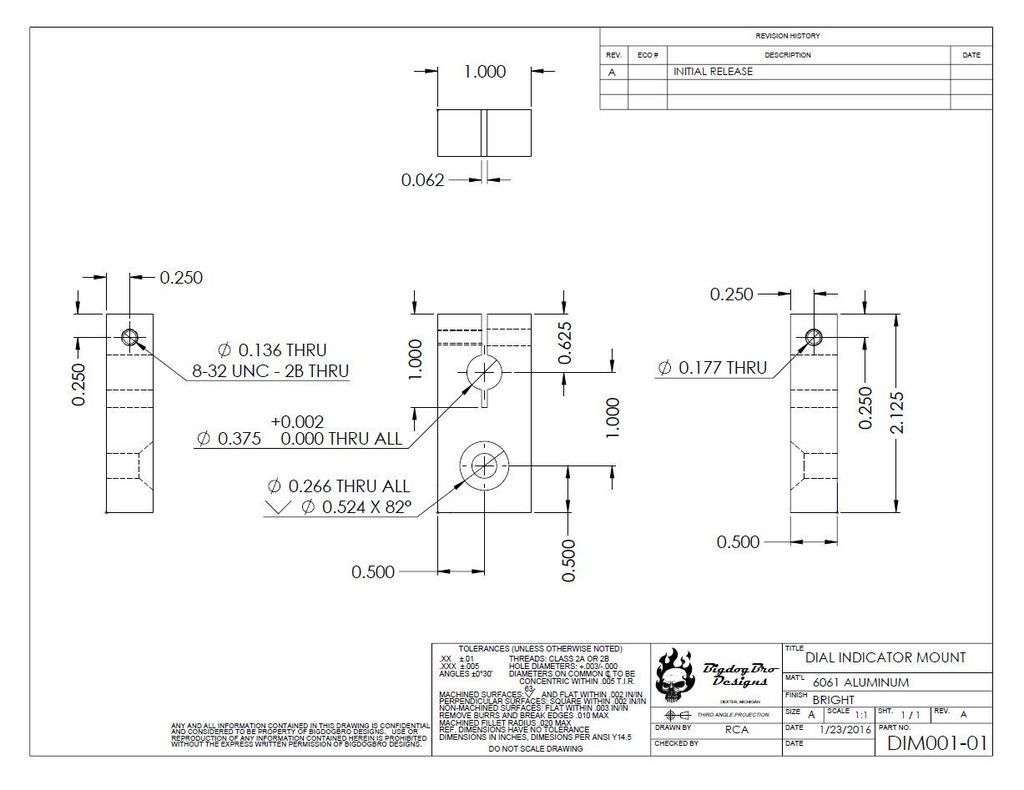
In this photo you can see the dial calibration set to .500" and zeroed. Calibration is done by adjusting the dial distance in the locking slide collar.
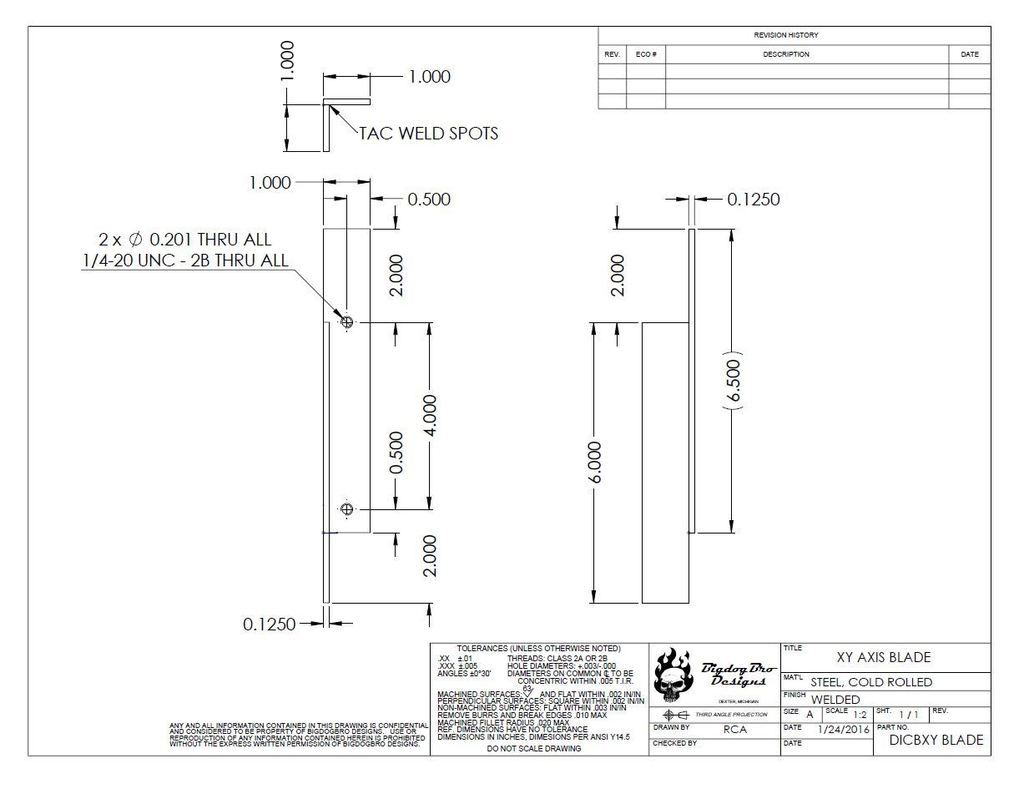
In the end I used a piece of aluminum 1.25" angle to fabricate the blade part and then I machined the ends to the .1250" thickness. Both the X and Y travel checks can be done on the same blade end without having to flip it over on the machine.
I hold the blade part onto the machine using a large magnet. The blade is bolted to the magnet and I remove my magnetic torch break-away
from the machine and attach the blade/magnet in its place when calibrating the machine. The magnet came from McMaster Carr #57005k41 http://www.mcmaster.com/#57005k41/=11g826b. You will do it whatever way works best on your machine.
This Youtube link will show you the break-away plate where the magnet is attached.
https://www.youtube.com/watch?v=D-mfRaXM3Og
How to use this tool:
Attach the axis blade to the Z-axis. Place the bar on a flat surface on top of the table slats. Position the bar in the direction of the axis you want to check distance. Position the Z-axis to the proper height to clear the bar but tag the bar end points. Adjust axis travel and bar to touch the ball end of the bar with the proper blade end. Zero out the axis to be checked. Set axis command to travel 36.000" away from the ball stop end. Check the dial indicator to be at .500" if table motors are properly tuned to match the DRO. Adjust accordingly based on the dial reading.
I hope this project is helpful.